Stripe Escrow User Guidance
Regarding the popularity of Stripe transactions, Stripe for Escrow is released to meet our customer demands and gives a hand to the product growth. Stripe for Escrow is also similar to PayPal for Escrow. It helps transactions among admin, freelancers and employers work smoothly with Stripe combined with Escrow system. Let’s take a look below for detail information and step-by-step instruction.
Requirements
- This feature is currently available if your marketplace is located in these countries:
- Australia ??
- Austria ??
- Belgium ??
- Canada ??
- Denmark ??
- Finland ??
- France (Metropolitan France only) ??
- Germany ??
- Hong Kong ??
- Ireland ??
- Italy ?? (possibly with limitations as it is still in preview mode at Stripe)
- Luxembourg ??
- Netherlands ??
- New Zealand ??
- Norway ??
- Portugal ?? (possibly with limitations as it is still in preview mode at Stripe)
- Spain ??
- Sweden ??
- Switzerland ??
- United Kingdom ??
- United States ??
Please click here for more information about Countries and currencies supported by Stripe.
- The recipient’s bank account (freelancer) also must be in the mentioned countries.
- When sending to a debit card, transfers must be less than $3000 (This card must be a Visa or Master card).
 How to Set up?
Configure Stripe API on Admin setting page.
Before you start, please make sure you have updated your Stripe’s profile (approved application) at: https://dashboard.stripe.com/account/application/settings
Please navigate to Dashboard → Engine Settings → Escrow → Gateways → Stripe API
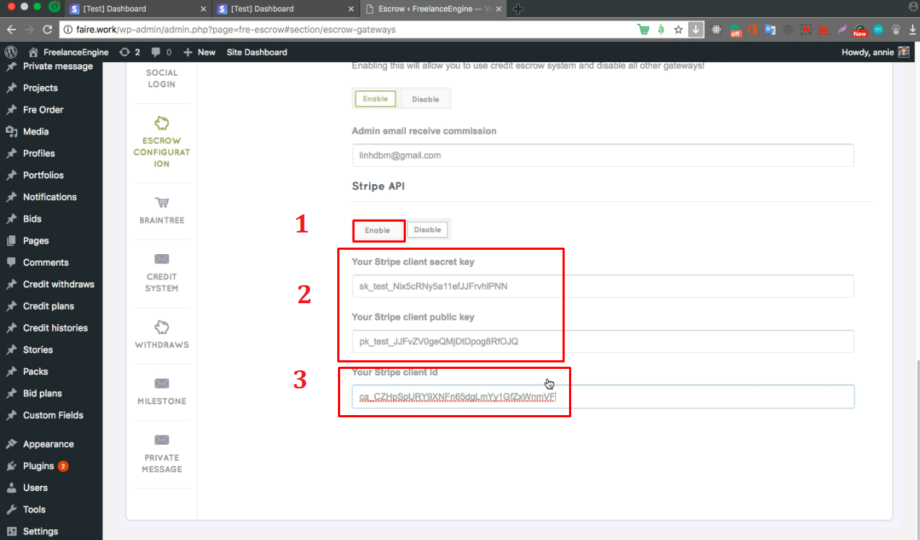

(1) Enabling this allows you to use Escrow Stripe system on your site.
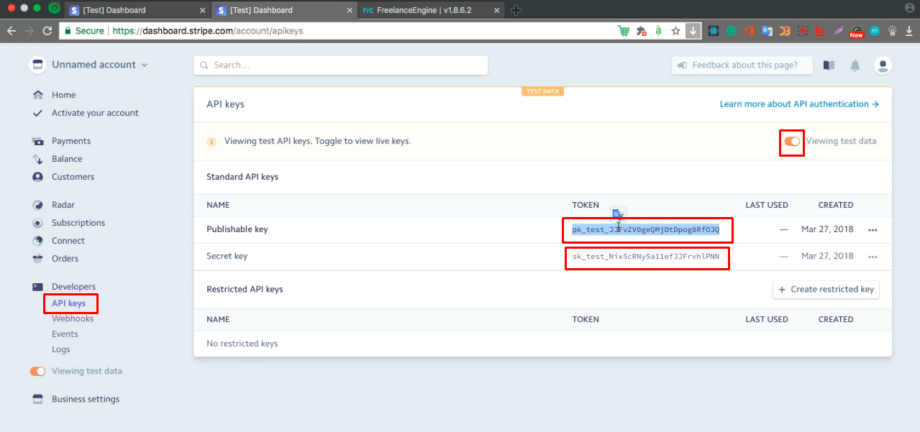
(2) Fill in: Your Stripe client public key (Publishable key) and Your Stripe client Secret key (Secret key). You can get it by going to: https://dashboard.stripe.com/account/apikeys
Note: Don’t forget to turn on Viewing Test Data option.
(3) You can get Stripe Client ID by going to: https://dashboard.stripe.com/account/applications/settings as the photo below:
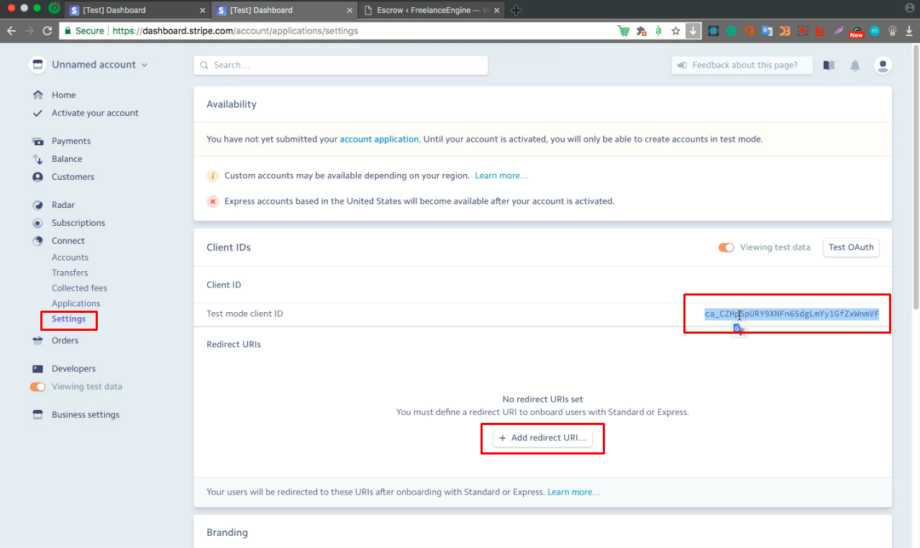

You also need to Add redirect URL:
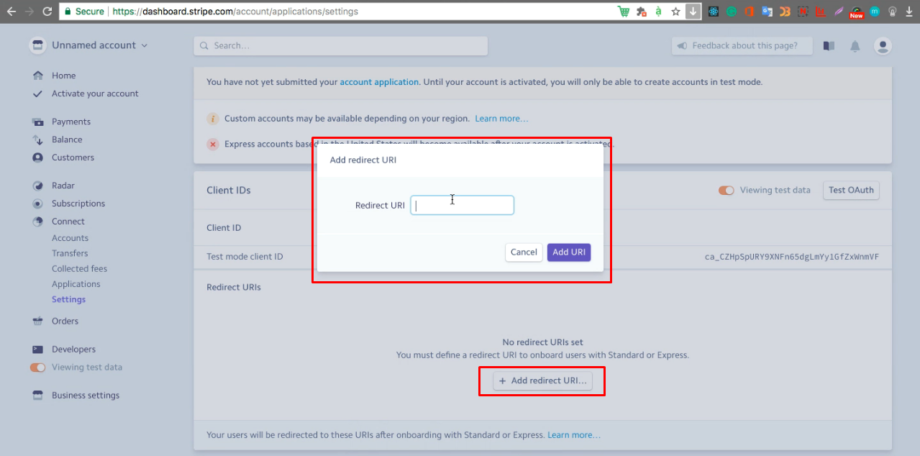

For example: enginethemes.com/profile

Workflow

The Escrow system will start working as soon as the employer accepts a bid. The process will work step by step like below.
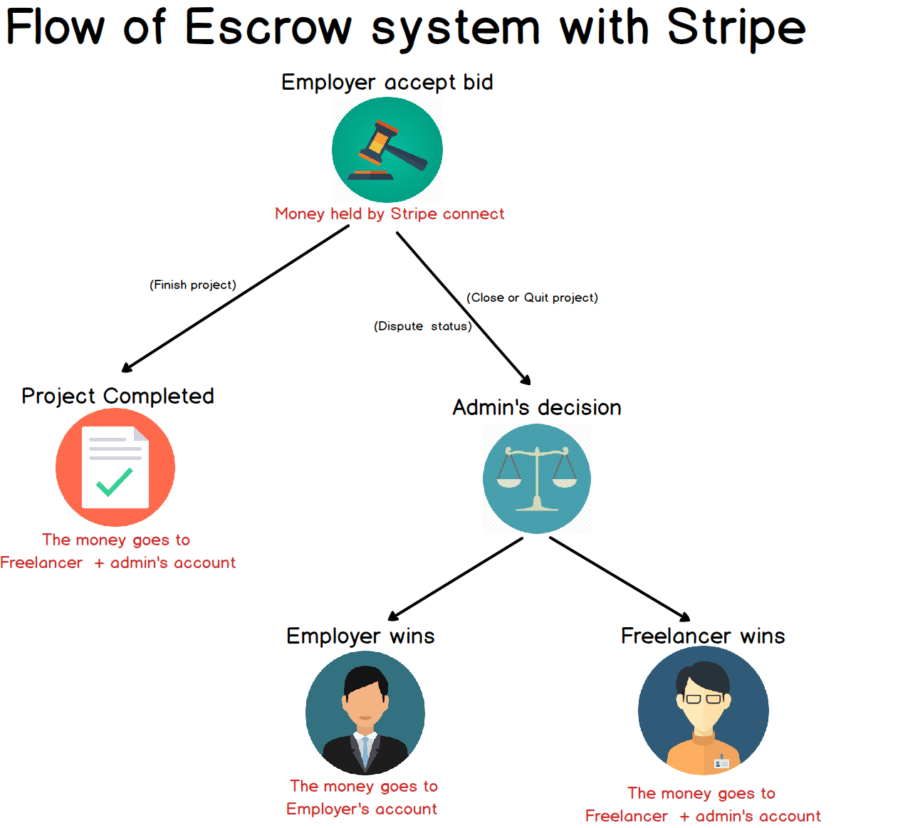
- Step 1: When Employer accepts a bid, he will pay the bid budget (example: $10) to Admin’s Stripe account.
- Step 2: After Employer accepts a bid, this project will change its status to “Processing”. If the employers “FINISH” this project, the Escrow process will move to step 3. Otherwise, the employers “CLOSE” or freelancers “QUIT” this project, it will turn the status into “dispute” and Escrow process will jump to step 4
.
- Step 3: After the employer clicks “Finish” button, this project’s status will become into “Completed”.
- Step 4: The freelancer and employer will send their reports to Admin, and Amin will decide who the winner is in this case.
Leave A Comment?
You must be logged in to post a comment.